Before you begin, you will require the following:
- USB Flash Drive (4GB minimum)
- Windows 7 ISO Image file (or DVD as explained in how to create ISO section)
- Reading all of my notes completely as things change if you are doing an upgrade vs. new installation. (see the upgrade section for important info.)
- You must be careful when using any tool that formats drives – you could toast your current operating system if you are not careful!! I take no responsibility for your lack of attention to detail or inability to read and FOLLOW ALL of these instructions!
The VERY easy ways first!
Method one:
Use the Windows 7 USB/DVD tool!
You will need and ISO image of Windows 7.
Installation:
To install the Windows 7 USB/DVD Download tool:
1. Download the Windows 7 USB/DVD Download tool installation file.
2. When you are prompted to, either save the file to disk or run it, choose Run.
3. Follow the steps in the setup dialogs. You’ll have the option to specify where to install the Windows 7 USB/DVD Download tool and whether to create shortcuts on your Start Menu or Windows Desktop.
[You need to be an administrator on the computer you are installing the Windows 7 USB/DVD Download tool on.]
Launch the tool, navigate to your ISO file (usually purchased directly through Microsoft store or created by you – see the creating and ISO section), and walk through the wizard.
(Note you can use this tool with Windows Vista ISO too to create a Vista USB install)
That’s it.
The wizard lets you select your source ISO file (Win 7 install), it formats your USB drive/stick, and then copies all your files over and makes that USB drive/stick bootable.
Once you have created your ‘bootable USB Thumb drive you are ready to install.
To do that, reboot your computer.
Now while your system is starting up press the appropriate button (usually F1, F2, F12, ESC, Backspace, or Escape) to bring up Bios Boot Menu.
Change the startup order to boot USB by default. Once done, save changes and restart the system.
On some systems (like Dell) you can just press F12 for a ‘select boot’ option too – very easy.
The install (or upgrade to) your new operating system.
For Windows XP Users
The following applications must be installed prior to installing the tool:
* Microsoft .NET Framework v2 must be installed. It can be downloaded here.
* Microsoft Image Mastering API v2 must be installed. It can be downloaded here.
Once the USB is created, by any method describe here, search for and delete the file named ‘ei.cfg’. This is usually located in the ‘\sources\’ directory.
Doing this step is what makes the USB memory stick allow you to install any version of Windows 7 as it no longer has a default version configured.
[Warning: This procedure will allow you to install a copy of Windows 7 that you may not be licensed to have. Therefore you need to be very careful to only select a version that you have a licensed key for as you will not be able activate Windows without valid a key!]
Method Two:
This is much like method one just using an open source tool.
Use the UNetbootin (Universal Netboot Installer) tool found here.
Insert the USB drive, run UNetbootin, and select Disk Image as ISO. Browse your local drive for Windows 7 ISO that you downloaded and click Open. Now Select Type as USB and choose the drive. Once done, it will look like a bit similar to the screenshot shown below.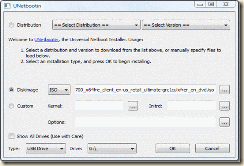
Click OK and it will begin extracting all installation files to the USB drive. The whole process will take some time, so have patience.
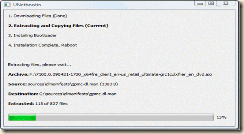
Follow same method as above to boot to the USB drive.
How to create ISO:
If you have a CD or DVD and not an ISO you can try and create and ISO from your DVD using one of these Freeware tools:
LC ISO Creator creates ISO files from CD/DVD-ROM. ![]() download (LCISOCreator.zip – 14 kB)
download (LCISOCreator.zip – 14 kB)
ImageBurn
ImgBurn is a lightweight CD / DVD / HD DVD / Blu-ray burning application that everyone should have in their toolkit!
Get ImgBurn here
About upgrading to Windows 7:
This section was taken from here.
When doing an upgrade MS limits you to what ‘type or flavor’ of the OS you can upgrade to.
Example; Vista Home Premium can only be upgraded to Windows 7 Home Premium, Windows 7 RC(and therefore ‘Ultimate’) can only go to Windows 7 Ultimate etc.
BUT HERE IS THE GREAT PART!
That is not entirely true!
You can upgrade to a different version with a simple registry adjustment.
Open a command prompt on your Vista or (Windows 7 Release Candidate) machine and type in:
Regedit
Navigate to HKLM(HKEY_Local_Machine)Software\Microsoft\Windows NT\ CurrentVersion
Change EditionID on the reg key from “Ultimate” to “[youreditionhere]”
and
Change ProductName on the reg key from Windows 7 Ultimate to “Windows 7 [youreditionhere]”
(minus the quotes of course)
Example:
EdittionID Professional
ProductName Windows 7 Professional
Close the registry editor, restart and do your install.
I have used this registry trick to upgrade some corporate Netbooks that came with Windows 7 Starter to Volume Licensed versions of Window 7 Enterprise.
Method Three – the hard(er) way:
Creating bootable Windows 7 USB install using Vista and Windows 7 installation DVD:
Step 1. Insert the Windows 7 DVD into your computer and the USB memory stick into your computer
Step 2. Open a “Command Prompt” and run “DISKPART”.![]()
This will launch the diskpart utility in a separate window and perform a UAC prompt (allow access)
Step 3. Type “LIST DISK” and take note what the disk number is of the USB memory stick. This will be the same size as the USB memory stick (eg. 3824 MB = 4 GB).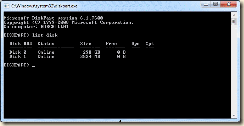
Step 4. Then type “SELECT DISK X” where X is the disk number of the USB memory stick.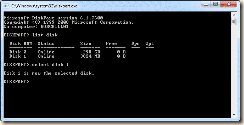
Step 5. Type “CLEAN”. Warning – This will wipe all data from the USB memory stick.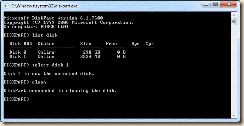
Step 6. Type “CREATE PARTITION PRIMARY”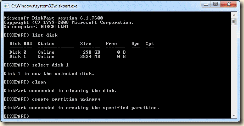
Step 7. Type “SELECT PARTITION 1”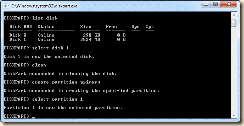
Step 8. Type “ACTIVE”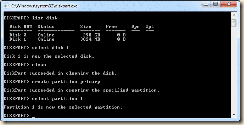
Step 9. Type “FORMAT FS=FAT32” (and wait about 5 minutes depending on the size and speed of the USB memory stick)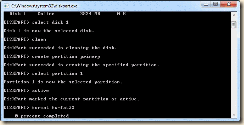
Step 10. Type “ASSIGN”.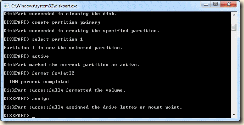
You will notice the auto play window now appears. Take note of the drive letter (e.g. F:\ ) and close this window.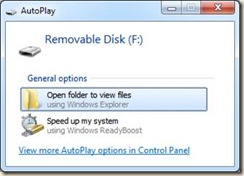
Step 11. Type “EXIT”
Step 12. Back at the command prompt type “xcopy d:*.* /s/e/f F:” where D: is the drive letter of you DVD and F: is the drive letter of your USB Memory stick.
Don’t worry if it takes a long time to copy boot.wim and install.wim as these are the two largest files on the DVD.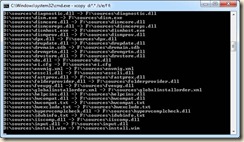
Step 13. Once the xcopy is finished run “del F:\sources\ei.cfg” from the command prompt and you Windows 7 Bootable USB memory stick is ready to go. Doing this step is what makes the USB memory stick allow you to install any version of Windows 7 as it no longer has a default version configured.![]()
You can now either boot from the USB memory stick or just run setup.exe from the drive to start the install process. Either way you will now prompted for the version of Windows 7 you want to install.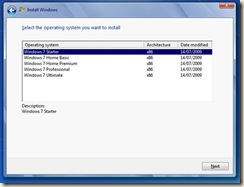
One thought on “How to create a bootable upgrade or installation USB thumb drive to install Windows 7”