Cleanup or Refresh an iDevice and Properly Restore it.

I’ve recently had a few people who had some problems with their iPhones and asked for some help. They were all of a sudden unable to receive calls and texts reliably or at all and or were notified they were running out of space. All were instructed by Apple and/or their carrier (in all three cases it was AT&T but could easily have been others) that they needed to reset their phone to factory settings. Problem is that without properly backing up the device(s), settings, applications and files everything is wiped!

Fortunately it’s pretty easy to back up iDevices and reset them to factory settings then restore the user files and settings such as contacts, call logs and messages. However as I’ve mentioned before Media such as images/videos and other media can sometimes be wiped and lost.

iPhones also have this problem of ‘filling up’ with pictures and videos. The only way to get them off is to manually delete them individually from the phone – a real pain in the anus.

So back to my favorite iDevice backup tool – DiskAid. It has it’s own backup tool that can ‘override’ iTunes backup and works real well. I use it often but some people would rather just use DiskAid to ‘remove’ data from their phone and do their backups in iTunes. So I’ll show that here to show the steps I took.

Get DiskAid and install it on your PC or Mac. And please read my previous post in iDevice backups.

First I used DiskAid to copy all photos and data – Diskaid has the ability to actually ‘SEE’ your data and remove pictures, movies and other items taking up space on your phone.

clip_image002

clip_image004

This copied off the images and movies to the PC.

Then I deleted a whole bunch of images and movies that were still on the phone to free up loads of space.

clip_image006

clip_image008

Cleared up to

clip_image010

The ran the iTunes Backup too.

1. Connect your iOS device to a computer with the latest version of iTunes installed

2. Select your iOS device in iTunes under Devices

3. Right-click (or Control-click) the device and select Back Up

The full iTunes backup can take a while be patient!

clip_image012

Also make sure you ‘Transfer you purchased items to iTunes:

right-click (Windows or Mac) or Control-click (Mac only) your device in the iTunes Source list, then choose Transfer Purchases from the shortcut menu that appears.

clip_image014

Then right-click after that is finished and run the ‘Sync “iPhone” one last time for good measure.

Now to ‘clear and restore’ the device.

Click on the ‘Restore’ radio button and choose the last backup you just created. You will be prompted:

clip_image016

If you have completely backed up, transferred files and synced all should be OK.

clip_image018

clip_image020

clip_image022

clip_image024

clip_image026

When the restore process has completed, the device restarts and displays the Apple logo while starting up:
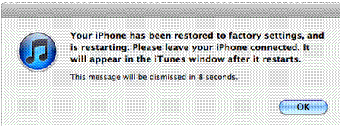
clip_image028

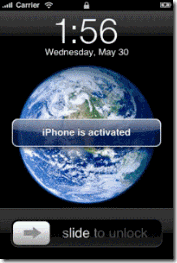
After a restore, the iOS device displays the “Connect to iTunes” screen. Keep your device connected until the “Connect to iTunes” screen goes away or you see “iPhone is activated.”
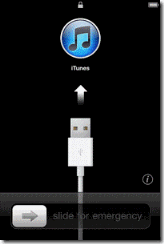
clip_image030clip_image032

Then to restore information from a backup connect your iOS device to the computer with which you normally sync then in iTunes:

Right-click (or Control-click) the device and choose Restore from Backup

Remember some of these steps can take some time – be patient!!

Your device should run much more smoothly after this.

Well hope this helps some. Peace out.

iDevice Backups

If you have an iPhone or other iDevice, you’ve probably wondered at some point how to backup iPhone data. There’s actually a pretty easy way to backup your entire iPhone using the iTunes software. The procedure requires a few steps, but everyone should be able to do it. Hopefully you did this when you 1st got your phone or other iDevice following Apples instructions. But I wanted to point out a few things and some alternative methods for insuring you can access your data. Especially if you have made many additions to your device; pictures taken, music downloaded apps purchased etcetera.

I have found that iTunes is KNOWN TO WIPE YOUR DATA – APPS, PICTURES AND MUSIC if you have not set up the sync/backup correctly!! I can’t tell you how many calls and emails I get from folks who have synced their iDevice only to find all their information has been wiped! And once wiped it is nearly impossible to retrieve (save for expert data recovery services $$).

So let’s start the Apple way:

To start the iPhone/iDevice backup, connect your iPhone to your computer with your USB cable, then start iTunes. Go to the devices list on the left side of the screen, and select your iPhone. You then need to right click on your iPhone, and select “Back Up”. This will start the backup procedure, and will take some time depending on how much data you have stored on your phone. Once the backup is complete, you will now have a complete collection of all your phone data stored on your computer. If your phone should get destroyed, you’ll be able to restore all of your existing data to a new phone. You can read Apple’s tutorial here for how to back up you iDevice here and here.

One thing I don’t like is that iTunes Store and App Store content on your iOS device may not automatically transfer to your computer as you might think by just doing a ‘sync’ or backup with iTunes. You can use the Transfer Purchases option in iTunes to ensure that all iTunes Store and App Store content is transferred to your iTunes library. Read how here.

I have found that getting pictures off of many iDevices – especially phones seems to be a major source of issues. I have used, with great success, many third party applications to ‘grab’ music, photos and videos from iPhones and iDevices for family and friends. If you have an iDevice I couldn’t recommend any more strongly  that you have at least one of these applications in your toolbox! Spend a little $ and get a real solution.

Now my way(s)!

The application that I have used most is DiskAid. It just works and you can do so very much with it! Check it out. It has the ability to do a complete backup of the ENTIRE iDevice, quicker and more thoroughly than iTunes.

Some others I’ve used are:

iPodAccess Mac version or PC version

CopyTrans

iPodRip

And finally a very good freeware application for getting stuff of iDevices to pc is called SharePod.

As a final note if you have an iDevice a must have application is this – Find My iPhone. It is now free and enables you to:

• Locate your iPhone, iPad, iPod touch, or Mac on a map
• Display a message on the screen
• Play a sound for two minutes at full volume (even if your device is set to silent)
• Remotely lock your device
• Remotely wipe your device to erase your personal data

OK folks be safe and keep your data backed up!

Consolidating and Cleaning up iTunes library and files

After consolidating, merging and updating a bunch of separate iTunes libraries and directories I was annoyed at how messed up my iTunes library and directories had become. I tried moving and ‘consolidating’ my library as described here for PC here for Mac go here. This method should retain all your playlists and remove many duplicates. There is also an Apple script to help if you are on Mac.

If you are on a Mac you can probably get by with using the move/consolidate technique and some GREAT script/apps located here. Doug’s main site is here  and worth checking out. I can’t say enough about the value of these tools – well worth the low price!

But sadly for me and many others nearly all my music is on (and managed) via Windows machines and *nix storage. So that still left me with loads of duplicates and entries with no actual files (file not found in iTunes). I also had come across loads of other music folders and libraries on old machines – many which had music that I didn’t in my current library but of course loads of duplicates.

So I was off to create a ‘clean’ iTunes library – No duplicates and all files correctly tagged. There are some applications that may do what I need for PC (as I’ll mention at the end) but I wanted to try and do it via freeware tools. [Take note that the following will eliminate your playlist and counts! So if you really need to have your playlist or play counts preserved don’t go further and try one of the paid options!]

Now, on to my adventure….

I deleted the original library. The location of your library files can be found here.

I then installed the latest greatest version of iTunes. After install, I set my directory options [in advanced preferences] to a new clean location on my HDD. I also set the option to ‘import new music to iTunes directory’.

I copied all my various music directories (from all machines and drives – both networked and external] to a temporary location; I ended up with about 7 different folders with loads of iTunes music directories.

I would then used that location to ‘import’ back into iTunes by selecting the ‘File’>Add Folder to Library’ option.

After all the importing was done I could see LOADS of doubles and garbage. So I set off to first remove the actual EXACT file duplicates.

Remember that many songs have the same Title, Artist and description tags (musically speaking) but may actually be different versions – live, acoustic, re-mastered etc., or from different albums such as compilations or soundtracks. So in iTunes you may see many doubles (if you go to File>Show Duplicates) that are really not actual duplicates!

My goal was to first delete the actual files that were exact file duplicates.

To do this I used the freeware tool Duplicate Cleaner download here. This looks for files based on their MD5 hash signature – so the file it finds are EXACTLY the same.

Download and install it and then run it. Select the location of your iTunes music folder and Choose scan.

clip_image002

When the scan is complete you should all your duplicate files.

Then you can highlight the ones you want to mark for deletion. Click on first item then the space bar and use the arrow key to move up or down to highlight next selections and press the space bar to ‘check’ the next and keep going till you have all your doubles or others you want removed highlighted.

clip_image004

Choose your delete or ‘move’ options. You may want to just move the items if you are really concerned about deleting files you might really want or need to keep.

clip_image006

clip_image008

Then I used the tool called iTunes Library Updater from here.

Download and install it.

Then open iTunes and minimize it.

Then open the iTunes Library Updater and run it.

Locate your iTunes music directory, as I mentioned, I put mine to a different location for easy sharing/backup/cleanup.

clip_image010

Select the folder

clip_image012

Here I chose the above options. Then ‘Start’

clip_image014

Then wait till done

clip_image016

Click close, close the application and then close iTunes.

Then reopen and check iTunes.

I actually did the above a few times and it made a HUGE difference in my library!

Real duplicates seem to be gone and my music tags appear to be much more in order too!

As I’ve mentioned, there are many other articles and some tools that are supposed to do all of this.

There are two highly rated applications – TuneUp is one and the other is Rinse, which may even do this even better, but they are not free (both run $39.00 I think). And I haven’t used either of them yet.

Here is Tune Up and over Here is Rinse.

Here is one such article with another tool.

But, I still haven’t found anything that has done as well a job as my above method for FREE.

I hope this helps some. Next time I might spring for the paid apps but I did learn something and maybe you will too! Good luck!